Showing posts with label candy. Show all posts

Wednesday, July 15, 2015

Bridal Shower Part 3: Fun and Games

So you're planning a bridal shower.  You've got your venue, you've got your food, your drinks, your decorations and your favors.  Obviously you're going to eat and open presents but how are you going to keep your guests amused for the rest of the time.  Also, at this point, shower guests expect something -- some kind of activity, contest or drawing.  

Personally, I'm not a fan of traditional shower games.  This is probably the main reason why I planned my own shower.  When I go to showers, I don't want to make wedding dresses out of toilet paper, I don't want to have to think and do a word scramble and I definitely don't want to do math to figure out how many minutes there are until the wedding.  That being said, I wanted to make sure that my shower games were relaxed and simple.

As you recall from my last post, there were white envelopes and pens on the tables.  The envelopes were from the Thank You cards that I would soon be writing.  (Since it was such a hot and sticky day, some of the envelopes became stuck shut and I had to steam them open to put the thank you card in).  Each person at the shower wrote their mailing address on the envelope and then put it in a basket.  During cake, I drew three envelopes.  The first two winners got small collage frames with $20 Shutterfly gift cards.  The gift cards came with dress orders from David's Bridal and I ordered a couple of collage frames from Amazon.com.  

The third winner received a Movie Night Popcorn Bucket filled with popcorn, candy and three DVDs.  I picked Jane Austen classics: Pride and Prejudice, Mansfield Park and Emma.  I was going to add a bottle of wine, but I had that bucked packed with snacks.  There were red vines, snow caps, bunch a crunch and more.  Most of the items I picked up at the Dollar Tree except for the movies.

My bench filled with all the goodies as well as a notebook for writing down who gave what gifts and the baskets to put things in.
The last set of prizes were scented hand soaps from Kohl's.  They were mainly purchased with coupons and $10 Kohl's Cash so that they were essentially free.  The little lady bug in the basket with the soaps is an egg timer.  As my fiance and I opened presents, we'd set the egg timer and whoever's present we were on when the timer went off would get a soap.  A good amount a time to set the timer is about 1 minute and 30 seconds to 2 minutes, but it really depends on how many gifts/ people you have.  I bought 12 hand soaps for 35 people.  The egg timer was cute but it wasn't working.  At a certain point, we had to use the timer on a phone because the timer wouldn't go off.  So I suggest just using someone's phone to begin with.

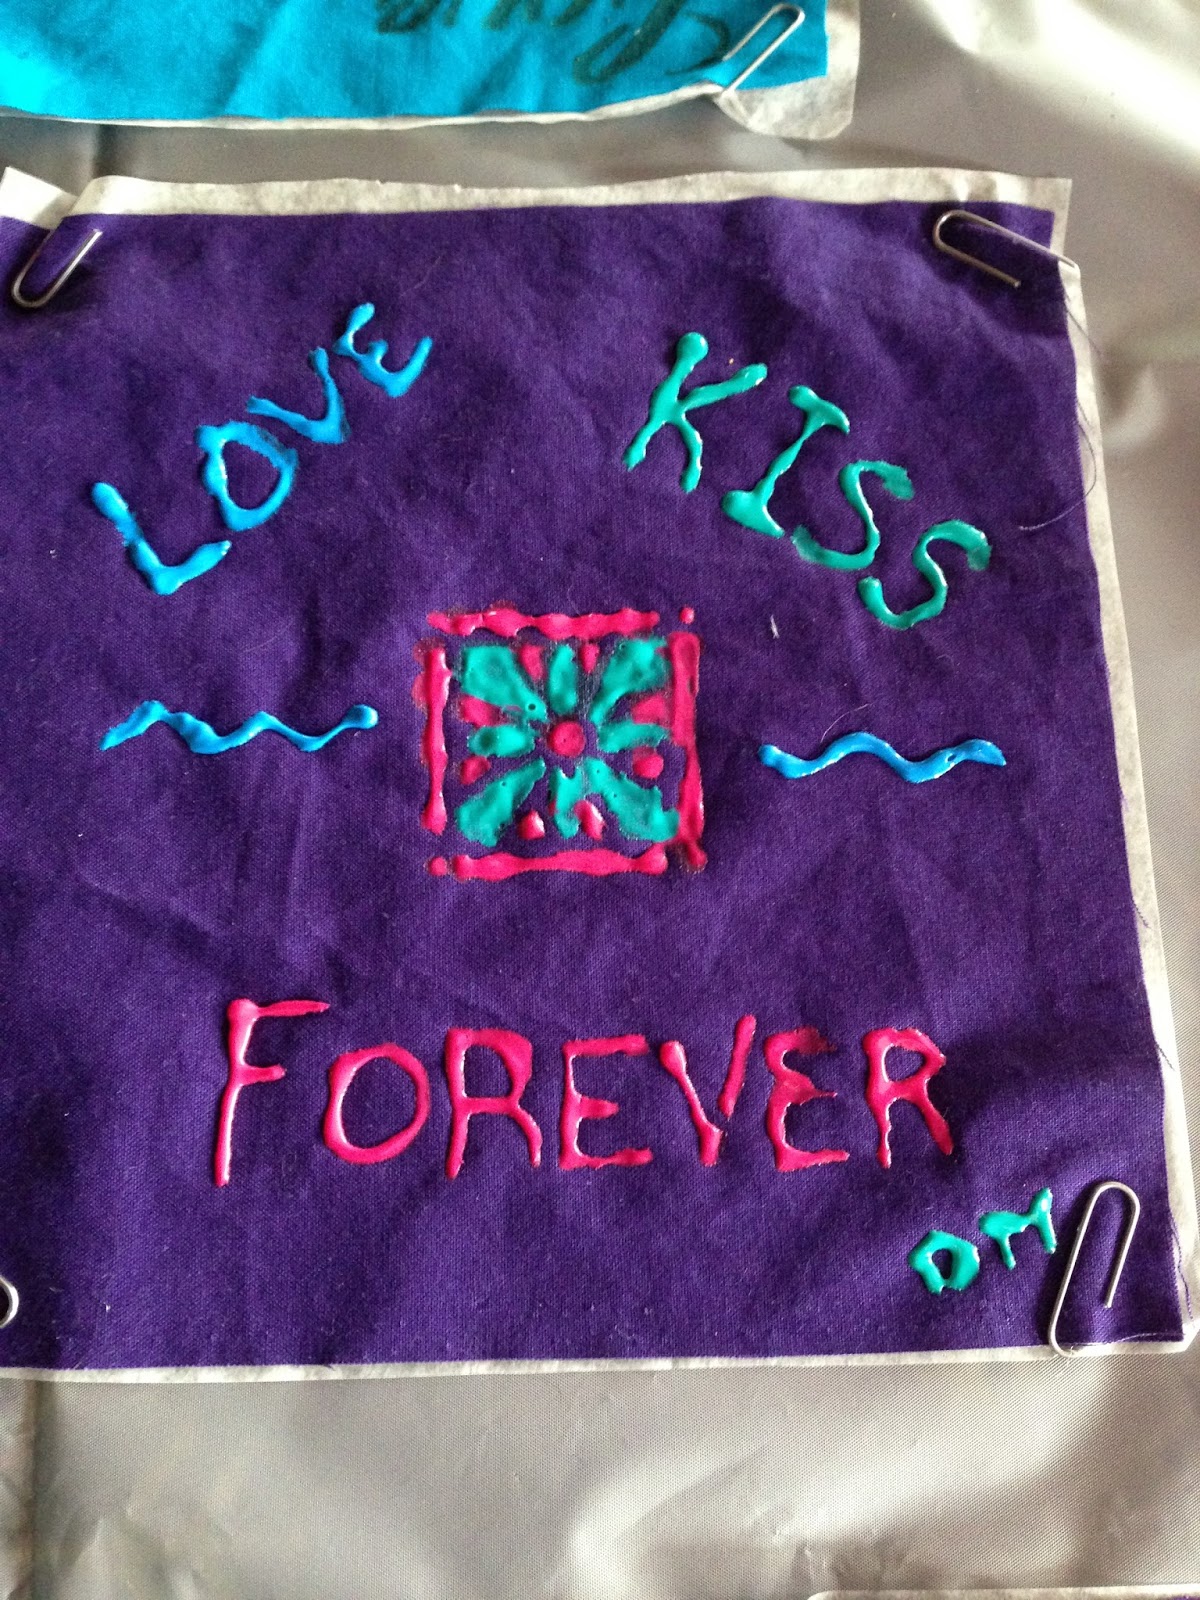
In between lunch and opening presents, we had an activity for the shower guests to do if they so chose.  We cut 8" quilt squares out of three different colors of fabric (we also bought coordinating fabric for the back of the quilt).  Then we paper clipped wax paper to the back of  the quilt squares so that the fabric paint or markers would not bleed through onto the table.  We bought paint markers and puff paint as well as rubber stamps and stencils for those who weren't artistically inclined and placed them all in baskets on a table where everyone could decorate them.  We also included, paper plates, small sponge brushes and Lysol wipes to make things easier on them.

Everyone seemed to have a good time decorating although, if you choose to do this activity, be sure to tell your shower guest to leave at least a 1/4" seam allowance.  Once of my bridesmaids who couldn't make it to the shower and her wife are going to assemble the squares for me.  I also saved a 16"x16" square in one of the colors to put my new last initial on.  It will be the center of the quilt.


 They take a few days to dry and anything in paint marker needs to be set with an iron after it dries.  Also, not everyone wants to decorate a square so my artistically inclined sister decorated some additional ones so we'd have a good amount on the quilt.

You may be wondering about the potted plants we used as centerpieces that I talked about in last week's post.  We used those as prizes as well.  There was one at each table so whoever had been in the longest relationship at each table got to take the centerpiece home.  Any leftover plants went to whoever wanted them.

And that was the end of the shower.  I kept the tablecloths and whatever was left of the plates and napkins to use for my rehearsal dinner.  Despite the hot stickiness and the rain, it was a good day and we had a lot of fun.  I hope these post help you with your shower ideas.

Wednesday, April 15, 2015

Homemade Candy Buttons

You know candy buttons?  Those little dots of sugar on strips of white paper?  They're pretty hard to find nowadays and sometimes the ones in the candy shops are fruit flavored which I personally find disgusting.

My family makes cut out cookies every year and I found that the icing we make for the cookies has a similar tastes and the icing also hardens and dissolves in your mouth in a similar way.  It was then that I decided to try and make candy buttons using this icing recipe and it worked out pretty darn well.

Ingredients

  • 2 Cups Confectioners Powdered Sugar
  • 1 Egg White (or powdered egg whites equal to 1 egg white if you're scared of salmonella)
  • 1 tbsp Water
  • 1/2 tsp Almond Extract
  • Food Coloring


Add the confectioners sugar, egg white, water and almond extract in a medium sized bowl and mix together using a hand mixer or a stand mixer.  Continue to mix until the mixture starts to peak.  If doesn't have to be so stiff that it sticks straight up -- the mixer just has to make thick ripples.  If it isn't peaking, then add a little more confectioners sugar.


Once you've got it mixed, there are two different approaches you can take depending on how many colors you want to make.  One approach is to get as many plastic baggies as colors you want to make.  Evenly distribute the mixture into each plastic bag and then place drops of food coloring into each bag,  Seal the bag and then squish the bag around so that the food coloring is evenly dispersed.  The second option is to just use one bag and then periodically add a different complimenting color to make a new color.  I chose the second version because it was easier for me to do.

Before you go any further, place wax paper on two large cookie sheets.  This is where you will put your buttons and the cookie sheets make it easier to move the buttons around while they're hardening.

Once you've got the food coloring mixed in, snip off a tiny piece of the corner like on a pastry bag.

The corner I snipped was a little too big -- make it as small as possible.

Now it's time to place your dots on the wax paper.  You want the dots to be the size of a pea.


If you chose the second option of mixing the food coloring like I did, you'll want to push the mixture away from the hole in the bag and then open the bag and add another color of food coloring.  I started with green and then added blue and then added yellow so I had 3 different shades of green.  Sometimes I'll start with white then add blue and then add yellow so that I have white, blue and green buttons.

Sorry for the blurriness of the picture
This will be what it looks like when you are done placing the buttons:


You have to wait 36 hours before these fill fully harden -- that's the only downside to these delicious things.